Hi, welcome back to Color Culture! I’m Salik Waquas, a full-time colorist with over a decade of experience in filmmaking. I firmly believe that films deserve a certain visual depth—an intangible quality that gives each frame its own emotional weight. As a colorist, my job isn’t just to make things look pretty; it’s to bring out the narrative’s subtext through color and tone. Over the years, I’ve worked on everything from big-screen features to short-form commercials, and through all of it, there’s one technique I’ve grown particularly fond of: Split Toning. Today, I’m going to share a custom DCTL (DaVinci Color Transform Language) code that enables split toning directly inside DaVinci Resolve. And yes, we’re going to have some fun with it, too.
Before we dive in, let’s get on the same page about what Split Toning is. Traditionally, split toning has roots in photography, where you’d apply one color tint to your shadows and another tint to your highlights. It’s like giving your image a subtle push into a certain mood—cooler blues in the shadows for a night scene, warmer reds in the highlights for a romantic sunset, or maybe a combination that conveys a specific era’s look. In motion pictures, this can help accentuate the narrative. For instance, think about giving your shadows a bluish cast to enhance a sci-fi vibe, or maybe injecting some green into the highlights to amplify a sickly, uneasy feeling in a horror sequence.
Why Use a DCTL for Split Toning?
The main advantage is control. LUTs are great, but they’re a bit like pre-packaged meals—they taste good but are not always easily customizable. A DCTL is more like having your own professional kitchen where you can adjust ingredients on the fly. By integrating this DCTL into your workflow, you get parameters to tweak right inside DaVinci Resolve’s interface. This means less guesswork and more direct creative input.
How to Implement This DCTL in DaVinci Resolve
- Download the DCTL: You’ll find the DCTL file at the end of this article. Just copy and save it on your system.
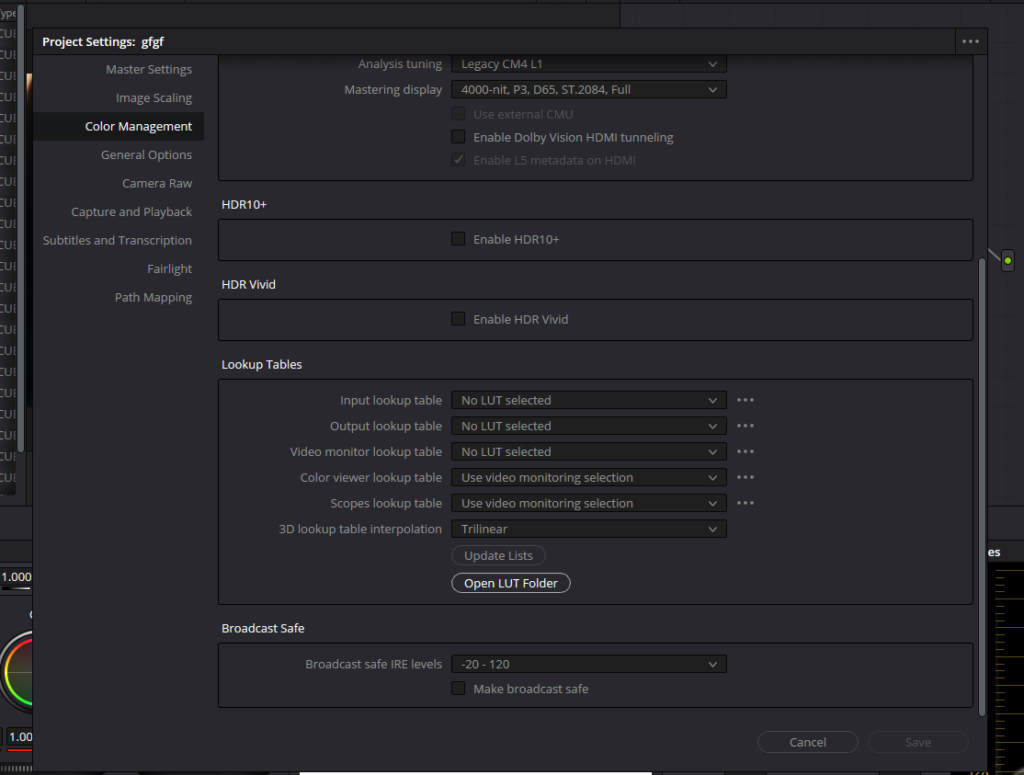
- Where to Put It: Start by opening Resolve and clicking on the gear icon at the bottom-right corner of the interface to access the Project Settings. Then, navigate to the Color Management tab and scroll down until you find the Lookup Tables (LUT) section. Click the “Open LUT Folder” button to jump directly to Resolve’s LUT and DCTL directory. Inside this folder, you’ll see a subfolder named “DCTL.” Simply drag and drop your downloaded Split Toning DCTL file into this DCTL folder.
- Restart DaVinci Resolve: Relaunch Davinci Resolve so it can detect the new DCTL.
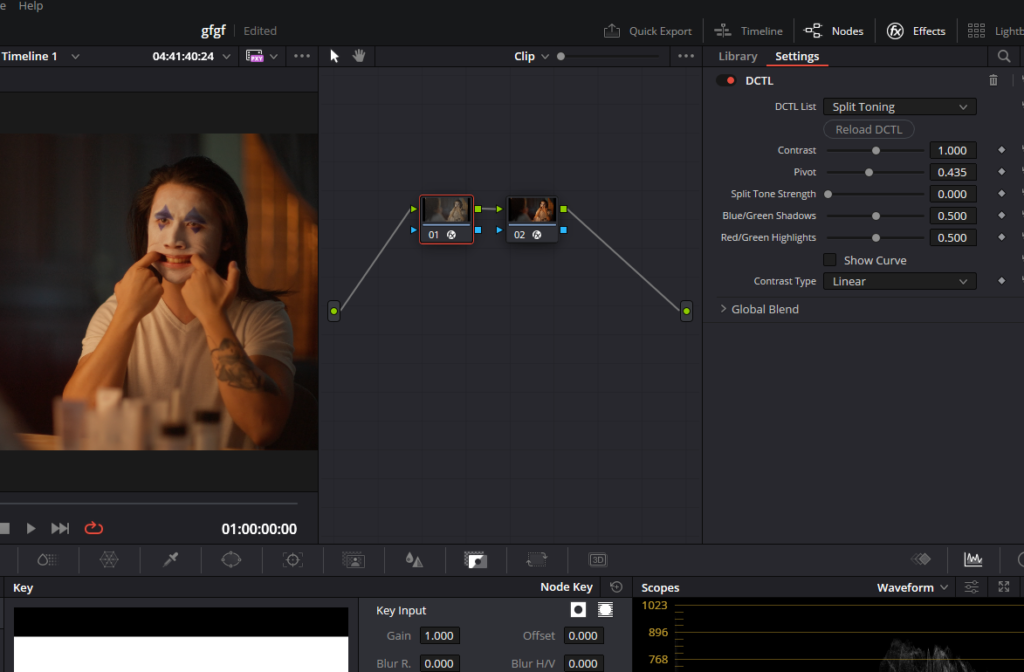
- Apply the DCTL: In your Color page, open the Effects panel from the top right corner. Search for “DCTL” in the OpenFX panel. Drag and drop it onto a node in your node tree.
- Adjust Parameters: From the DCTL drop-down menu, select ‘Split Toning’, Now, you can begin using the controls within the DCTL.
Understanding the Parameters
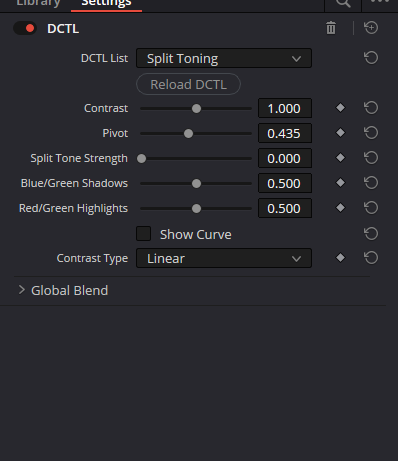
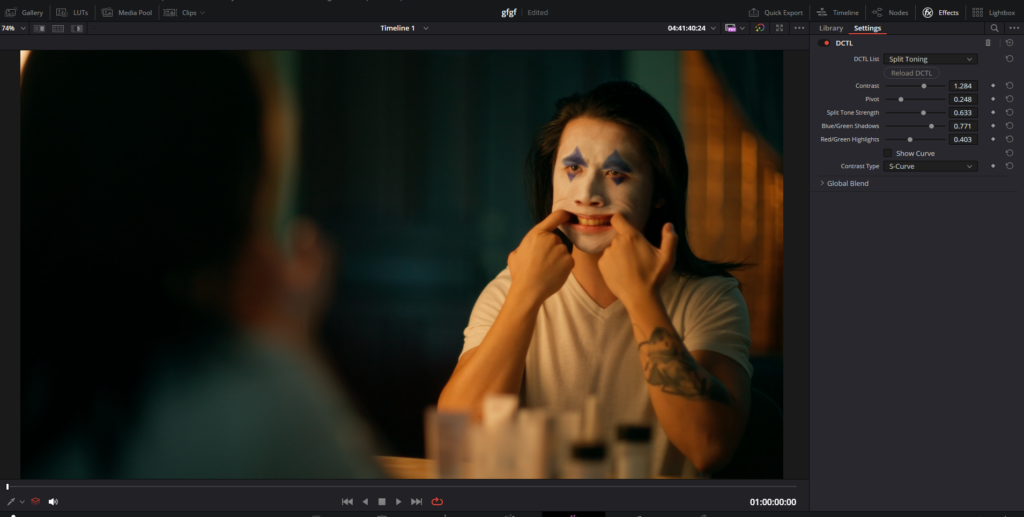
- Contrast: Adjusts how steep or flat the tonal curve is. A higher value gives you a punchier image, while a lower value flattens it out.
- Pivot: Determines the tonal point around which contrast is applied. Adjusting this can change whether your contrast affects midtones, shadows, or highlights more aggressively.
- Contrast Type (Linear or S-Curve): The linear option applies a straightforward contrast slope, while the S-Curve introduces a more subtle, filmic contrast. S-Curve is great if you want that gentle “roll-off” feeling on both ends of the tonal range.
- Split Tone Strength: This controls how strongly your selected colors tint the shadows and highlights. If you crank it up, you’ll get a more noticeable color shift. Keep it low if you’re aiming for subtlety.
- Blue/Green Shadows: This parameter mixes between adding more blue or green into the shadows. Sliding it around lets you find the perfect moody tint for your darker areas.
- Red/Green Highlights: Similarly, this parameter affects the highlights. Mix between red and green to find a highlight color that complements your scene.
- Show Curve: A nifty debugging option. When enabled, it overlays some indicators on your image so you can see how the tonal curve is being applied. Handy if you’re a nerd like me and enjoy peeking under the hood.
How Does the Code Work?
Let’s break down the code functions for some good old “under the hood” insight. The DCTL code basically processes each pixel of the image. It’s not just slapping on a LUT; it’s performing a series of math operations to remap tonal values based on your chosen parameters.
- apply_linear_contrast(): This function takes an input value (in), a contrast, and a pivot. It then recalculates the pixel value so that it’s either pushed away from or pulled toward the pivot value. Think of it as a simple equation that stretches or compresses your tonal range around a chosen midpoint.
- apply_rolling_contrast(): This is used when you select the S-Curve contrast option. Instead of a simple linear equation, it uses a power function (_powf) to create a more nuanced, film-like curve. When the pixel value is below the pivot, it reshapes it in one way; when it’s above, it reshapes it another. This creates that characteristic “S” shape that gently lifts shadows and rolls off highlights.
- apply_highlight_split(): Once your contrast is set, this function applies a tint to the highlights. It takes an input pixel and calculates new values for red and green channels based on strength and color_mix parameters. You’ll notice some math here that scales the red and green channels, then normalizes them based on the maximum value. This ensures you don’t blow out your highlights while adding the tint.
- apply_shadow_split(): Similar to apply_highlight_split(), but for the shadows. It cleverly transforms the pixel by inverting it (1 – in.x, 1 – in.y, etc.), applying the color adjustments, and then flipping it back. This process lets you subtly add a blue/green tint without crushing the blacks or causing unwanted artifacts.
- UI Parameters: The code also defines UI parameters at the end. These lines create sliders and combo boxes in Resolve’s interface. This is where the code and Resolve’s UI come together, giving you those handy knobs to twist.
When the transform() function runs, it applies contrast first (either linear or S-curve), then applies the shadow and highlight splits. Finally, if opt_showcurve is enabled, it overlays some pixels to visualize the curve on the image—great for troubleshooting and understanding what’s going on.
Download the Split Toning DCTL
Also check out our Film Density DCTL Davinci Resolve article. Happy grading!
Browse Our Cinematography Analysis Glossary
Explore directors, cinematographers, cameras, lenses, lighting styles, genres, and the visual techniques that shape iconic films.
Explore Glossary →