Welcome back to Colorculture.org, where we delve into the intricacies of video editing. I’m Salik, and today we’re diving into the world of object tracking using DaVinci Resolve on the iPad. Object tracking is an essential skill for any video editor, enabling precise alignment of elements within a scene, even amidst movement. Let’s explore how to leverage this powerful feature effectively.
OBJECT TRACKING in DaVinci Resolve iPad
Step 1: Setting Up Your Workspace
First things first, ensure you have a keyboard handy. Whether it’s a Bluetooth or physical keyboard, having one will streamline your workflow. Now, let’s assign a shortcut to the media pool within DaVinci Resolve:
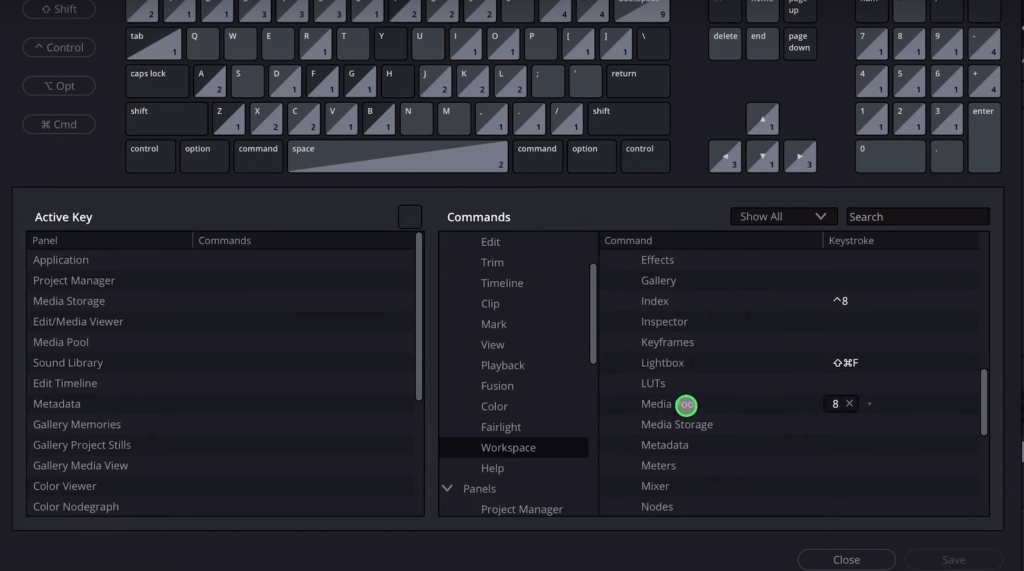
- Press Option + Command + K simultaneously.
- Navigate to Application > Workspace.
- Scroll down and select Show Panel in Workspace.
- Locate Media Pool and assign it a shortcut of your choice (e.g., 8).
With our workspace configured, we’re ready to dive into object tracking.
Step 2: Initiating Object Tracking
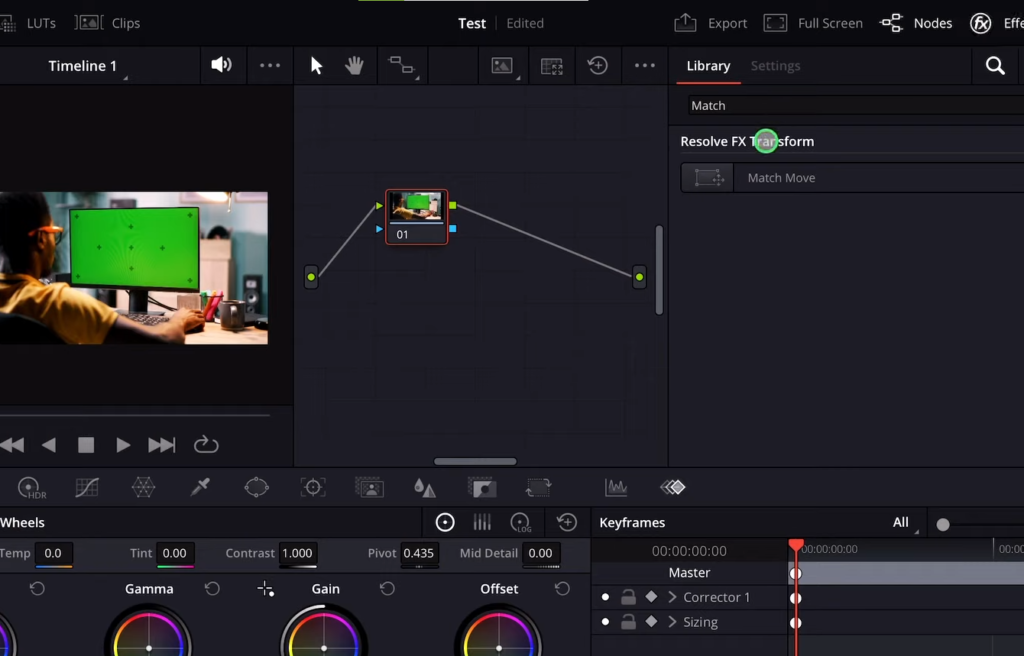
- Select the clip you wish to track.
- Navigate to the Color Page.
- In the Effects panel, search for Match Move.
- Drag and drop the Match Move node onto your node graph between the line.
Now that we’ve set up our tracking node, it’s time to designate tracking points.
Step 3: Designating Tracking Points
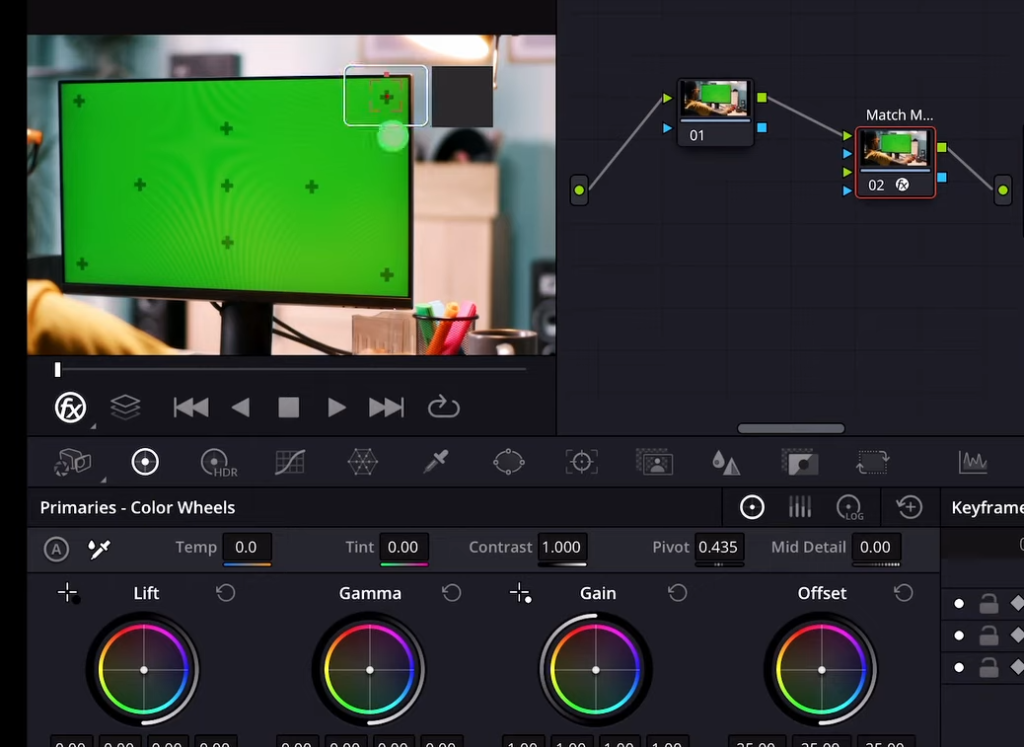
- Ensure the OpenFX Overlay is activated in the viewer.
- Select multiple points across the frame with sufficient contrast for accurate tracking.
With our tracking points established, let’s proceed to execute the track.
Step 4: Executing the Track
- Navigate to the Tracking Module of the Match Move.
- Initiate the track forward.
Depending on your clip’s duration and complexity, you may need to track backward as well to ensure comprehensive coverage.
Step 5: Integrating Additional Elements
Despite the absence of a media pool within the color page, our assigned shortcut grants us access to external media seamlessly. Let’s integrate additional elements into our scene:
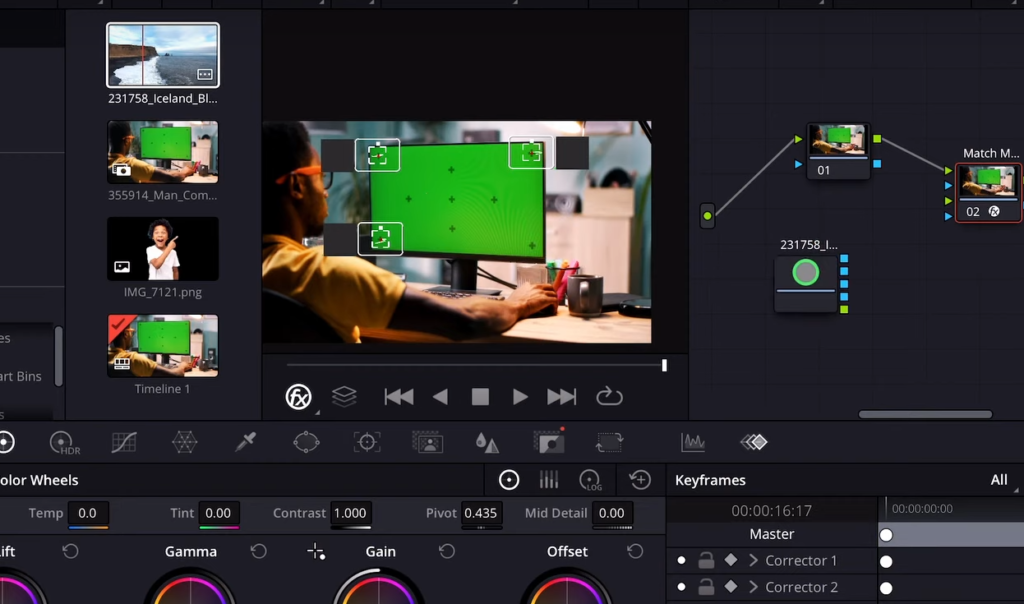
- Press the shortcut you assigned to access the Media Pool (e.g., 8).
- Drag and drop the desired media onto the node graph, aligning it with the tracked movement within the scene.
- Now match the green box of the element node to the green arrow of the match move node.
Now, let’s fine-tune the placement of our added elements.
Step 6: Fine-Tuning and Playback
- Adjust the positioning and scale of the added element to seamlessly blend it into the scene.
- Ensure each corner aligns seamlessly with the designated area within the scene.
- Initiate playback to observe the seamless integration of our added elements.
Step 7: Exploring Additional Possibilities
The beauty of object tracking lies in its versatility. Whether you’re integrating graphics into a live-action scene or enhancing visual effects, the possibilities are endless. Experiment with different elements and tracking techniques to elevate your video editing prowess. If you want to read Davinci Resolve tutorials on Windows/MacOS, you can read them on my second website, Filmmaking Elements. For my color grading services, contact me here.
Browse Our Cinematography Analysis Glossary
Explore directors, cinematographers, cameras, lenses, lighting styles, genres, and the visual techniques that shape iconic films.
Explore Glossary →