Hi, welcome back, everyone! I’m Salik Waquas, the owner of Color Culture, a boutique color grading company that works with clients worldwide to create amazing visual projects. Today, we’re diving into one of the simplest yet most powerful tools in color grading—creating a vignette in DaVinci Resolve. I’ll guide you through two different methods for adding a vignette, both of which are straightforward, so follow along and let’s get started!
What is a Vignette and Why Should You Use It?
In classic filmmaking, a vignette refers to the darkened edges of a film frame, often caused by the matte box casting a shadow on the camera lens. As camera technology advanced, especially with the transition to digital film, the natural vignettes that used to occur disappeared, leaving behind a tool that filmmakers and colorists often choose to add back in for creative effect.
A vignette can help direct your viewer’s attention to the central part of the frame—usually where the main subject or action is happening. By subtly darkening the edges, you can make your image feel more focused and compelling. When used properly, vignettes are barely noticeable but effectively guide the audience’s eye where you want it to go.
Let’s look at how we can create a vignette in DaVinci Resolve using two different methods.
Method 1: Creating a Vignette Using Power Windows
The first method we’ll explore is creating a vignette using Power Windows. This method gives you more control over the shape and softness of your vignette and is often the preferred approach when working with a more customized or complex shot.

Step-by-Step Instructions:
- Add a New Node:
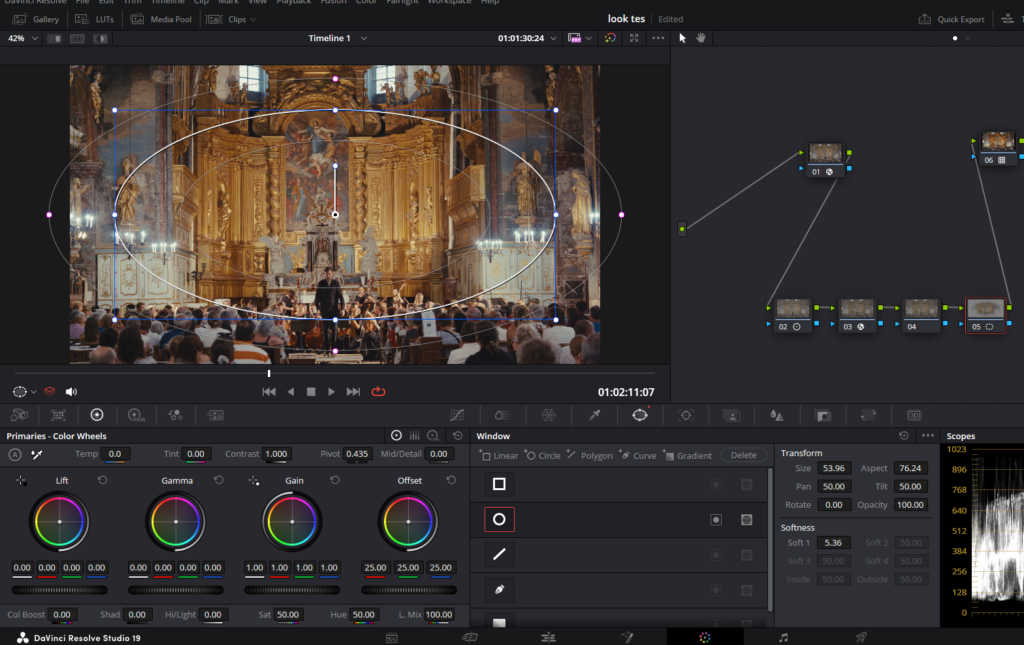
- First, go to the Color page and create a new serial node. To do this, right-click in the Node Graph (the section at the top right of the Color page) and select Add Serial Node. Name this node “Vignette” to keep things organized.
- Open the Window Palette:
- In the bottom center of the Color page, find the Window palette (it’s the square tab ). Click the Circle Window button to add an elliptical window to your shot.
- Adjust the Shape:
- In the viewer (the main window displaying your clip), click and drag the circle to resize and reposition it. Stretch or shrink the shape so that it covers most of the frame while leaving the central subject clearly visible.
- Soften the Edges:
- In the Viewer window, you will see small red handles around the circle. Use these handles to adjust the softness of the edges. This will make the vignette blend naturally into the rest of the frame. Before using this to create a vignette in Davinci Resolve, we have to invert the select because it affects the part in the circle. To invert, click on the white circle-looking icon in a box in the Window palette, which is in the bottom center.
- Hide the Window Outline:
- To remove the visible outline of the circle while you work, click the Onscreen Control Menu in the lower-left of the Viewer and select Off. This will keep the window outline hidden so you can see your image without distraction.
- Darken the Edges:
- In the Color Wheels (found on the right side of the Color page, below the Window palette), slightly reduce the Gamma by dragging the Gamma Master Wheel to the left. A value around -0.05 should be enough to create a subtle vignette effect.
Pro Tips for Power Window Vignettes:
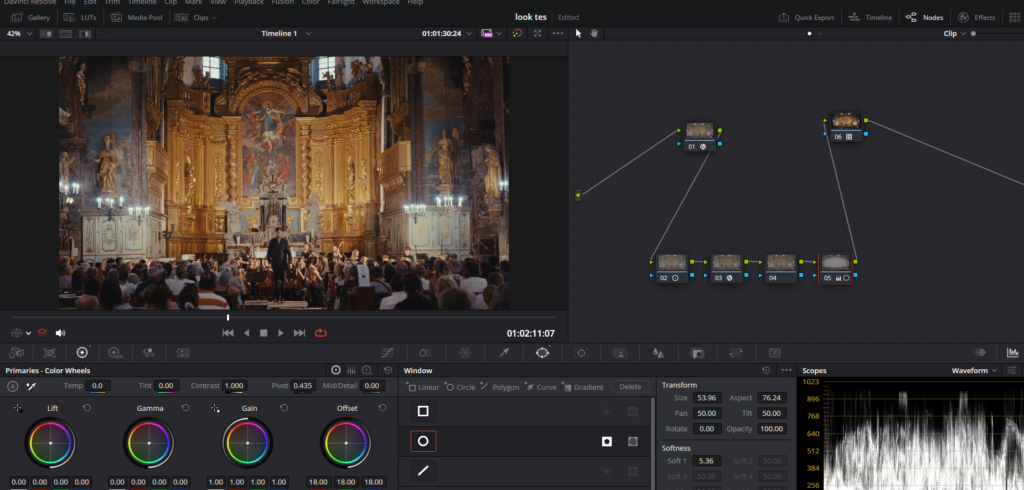
- Subtlety is Key: Vignettes work best when they are subtle. A common mistake is making the vignette too dark, which draws attention away from the subject rather than enhancing it. Always check your work by looking at the timeline thumbnail. If you see noticeable dark corners, it’s time to back off on the effect.
- Feathering Matters: Feather the edges enough so that the vignette fades seamlessly into the image. This makes the adjustment feel natural and helps maintain the viewer’s immersion. Hard edges are a giveaway that the footage has been manipulated.
- Fine-Tune the Gamma: If you feel the vignette is affecting some bright areas of the frame—like the sky—too much, consider adjusting the Gamma or using Custom Curves to refine the effect to only impact midtones. This level of control will help preserve the overall balance of your image.
Method 2: Creating a Vignette Using the Vignette Effect
The second method involves using DaVinci Resolve’s built-in Vignette effect. This approach is quicker and can be useful for simple setups or if you’re just getting started with color grading.
Step-by-Step Instructions:
- Select the Clip:
- Go to the Color page and select the clip you want to apply the vignette on.
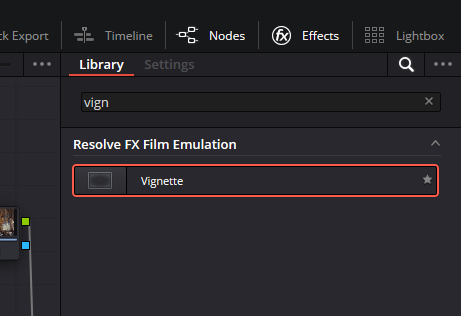
- Open the Effects Library:
- Click on Effects in the top right corner of the Color page. Scroll through the list until you find Vignette. Drag and drop the Vignette effect onto the node where you want the vignette to be applied.
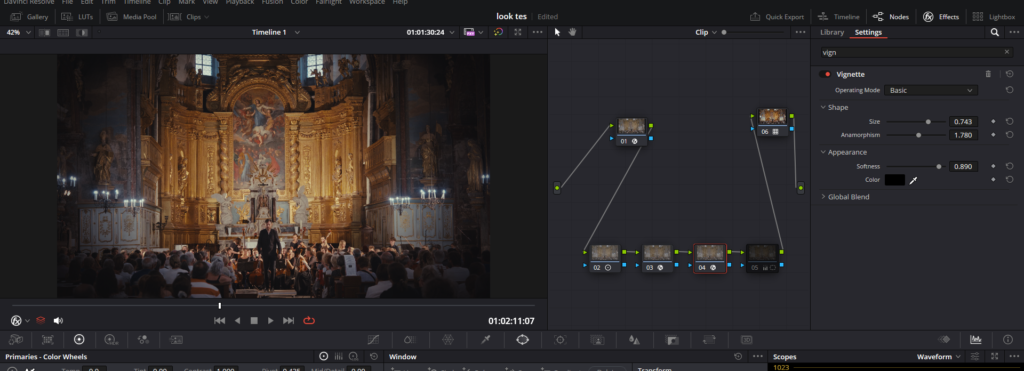
- Adjust the Default Settings:
- The vignette effect will be quite strong at first, as the default settings are set for easy visibility. To make it look natural, you’ll need to dial it back.
- Customize the Vignette:
- The plug-in comes with two modes: Basic and Advanced.
- Basic Mode: In Basic mode, you have controls for Size, Anamorphism, Softness, and Color. These controls allow you to quickly create a traditional lens vignetting effect to darken the edges of the frame. You can also add a slight tint to the vignette if you want to match the color grade of your scene.
- Advanced Mode: If you need more customization, switch to Advanced Mode. This mode provides additional controls for Border Shape, Rotation, Center, Transparency, and Composite Type. This is useful for more complex shots where you need the vignette to match specific elements of the composition.
- Adjust the Size and Softness:
- Typically, I prefer to use Basic Mode for most projects. Use the Size slider to adjust how far into the frame the vignette extends. Then use the Softness slider to make the vignette as subtle as possible. The goal here is to create a smooth transition between the edges and the center of the frame.
Benefits of Using the Vignette Effect:
- Time-Saving: Compared to the Power Window method, this approach is faster since the settings are built-in, and you don’t need to manually create shapes or adjust many parameters.
- Quick Customization: The ready-made settings make it easy to add a vignette without overthinking the technical aspects. This is particularly helpful when you’re working on a tight deadline and just need a quick way to enhance your footage.
Thanks for following along! I hope you found these methods useful, and I encourage you to try them out on your next project. If you have any questions or tips of your own, feel free to share them in the comments below.
Happy grading!
- Also Read: Film Density DCTL Davinci Resolve (Free Download)
- Also Read: Import/Open XML in DaVinci Resolve: A Step-by-Step Guide
Browse Our Cinematography Analysis Glossary
Explore directors, cinematographers, cameras, lenses, lighting styles, genres, and the visual techniques that shape iconic films.
Explore Glossary →