Hi, welcome back to Color Culture! I’m Salik Waquas, a full-time colorist with over a decade of hands-on experience in filmmaking and color grading. Today, I’m excited to talk about something that has piqued my interest for a long time: the Color Shift Tetra DCTL for DaVinci Resolve. This tool draws inspiration from Steve Yedlin’s renowned Display Prep Demo video, where he shows how he crafts his own custom film emulations and color profiles. His technique has influenced many colorists, myself included, and the Color Shift Tetra DCTL brings that kind of nuanced color manipulation right into your Resolve workspace.
Now, before we dive in, let’s talk about what this DCTL actually does—without getting stuck in any complicated code. In essence, the Color Shift Tetra DCTL is like having a set of finely tuned levers that let you adjust how different colors interact with each other. Instead of just pushing an overall tint or using a traditional color wheel, this DCTL breaks down image data into various subtle relationships—like how red affects red, green, and blue, and similarly for green, blue, and even secondary colors like cyan, magenta, yellow, plus white. This may sound technical, but trust me, the results are well worth it.
Why Use a DCTL Like This?
As someone who’s been grading for a long time, I’ve learned that precision is king. Standard color wheels, curves, and LUTs are fantastic for broad strokes and common looks. But when you need to craft something truly unique or emulate the feel of a specific film stock, you often need more control. DCTLs (DaVinci Color Transform Language files) allow for direct mathematical manipulation of the image’s color channels, giving you a scalpel instead of a hammer.

The Color Shift Tetra DCTL goes beyond the basic “primary” or “secondary” adjustments. Think of it like this: you’ve got the primary colors (red, green, blue), the secondary colors (cyan, magenta, yellow), and white, each represented as its own axis of control. This DCTL introduces controls that determine how these colors influence each other. For instance, you can tweak how much a certain red value affects the perceived yellows or whites in your image. It’s like building your own custom color matrix, but with an easy-to-use interface right inside Resolve.
What It Actually Does
Picture a series of sliders that let you influence how colors mix with each other. For example, you might have a slider that adjusts how reds interact with greens, or how blues interact with yellows. By pushing or pulling these sliders, you can guide the viewer’s eye, refine skin tones, or add subtle depth to landscapes without crushing or over-saturating the image.

These adjustments don’t just uniformly shift colors; they’re intelligently applied depending on the brightness and dominance of certain channels. The DCTL looks at the pixel values of each channel and, depending on which channel is the brightest or darkest, applies a carefully weighted combination of these color shifts. This ensures that the transformations are context-sensitive, much like how film stocks or certain analog processes respond differently to variations in lighting and exposure.
How to Implement the Color Shift Tetra DCTL in DaVinci Resolve
Let’s break it down step by step. We’re talking about a user-friendly approach, so I’ll walk you through each detail:

- Download the DCTL File:
You’ll find the Color Shift Tetra DCTL file at the end of this article. Download the .dctl file on your computer. - Add It to Resolve’s DCTL Folder:
- Open DaVinci Resolve.
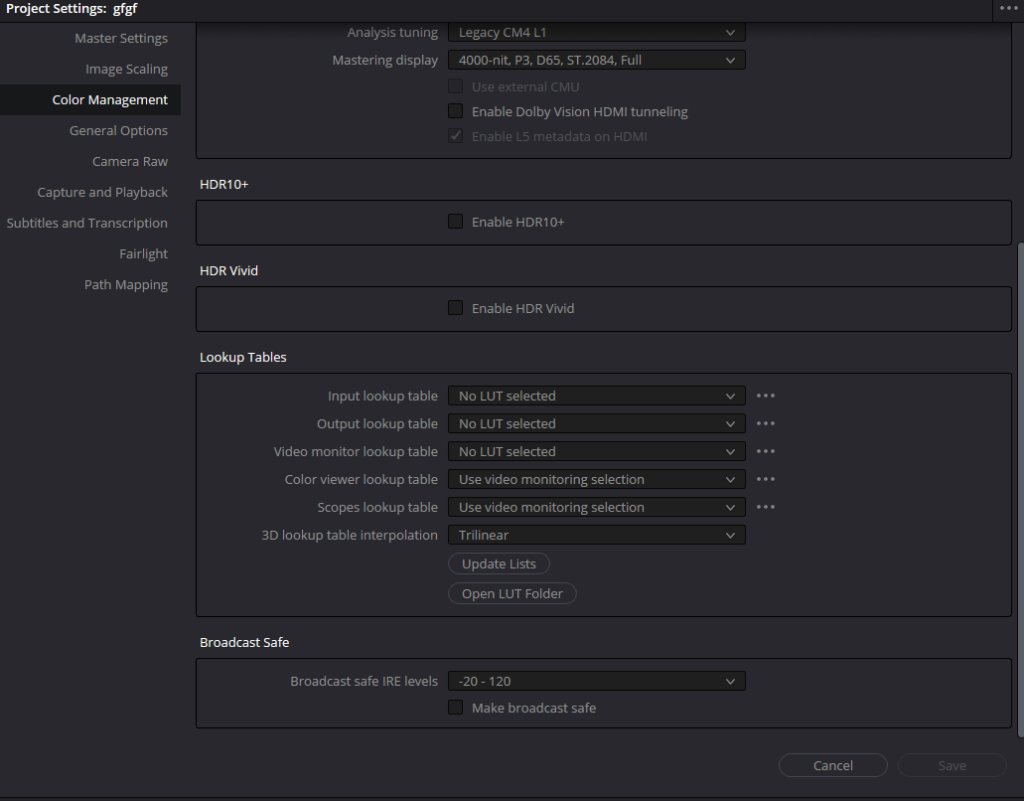
- Click on the gear icon at the bottom-right corner to open Project Settings.
- Go to the “Color Management” tab and scroll down until you see “Lookup Tables.”
- Click the “Open LUT Folder” button. This takes you directly to the Resolve LUT and DCTL directories.
- Inside, there will be a folder named “DCTL.” Just drag and drop your .dctl file into that folder.
- Restart Resolve:
Close and reopen DaVinci Resolve. This step ensures that the software properly detects the new DCTL. - Apply the DCTL in the Color Page:
- Switch to the Color page in Resolve.
- Look to the top-right corner, and click on the Effects button.
- In the Effects panel, type “DCTL” into the search bar.
- Drag and drop it onto a node in your node tree.
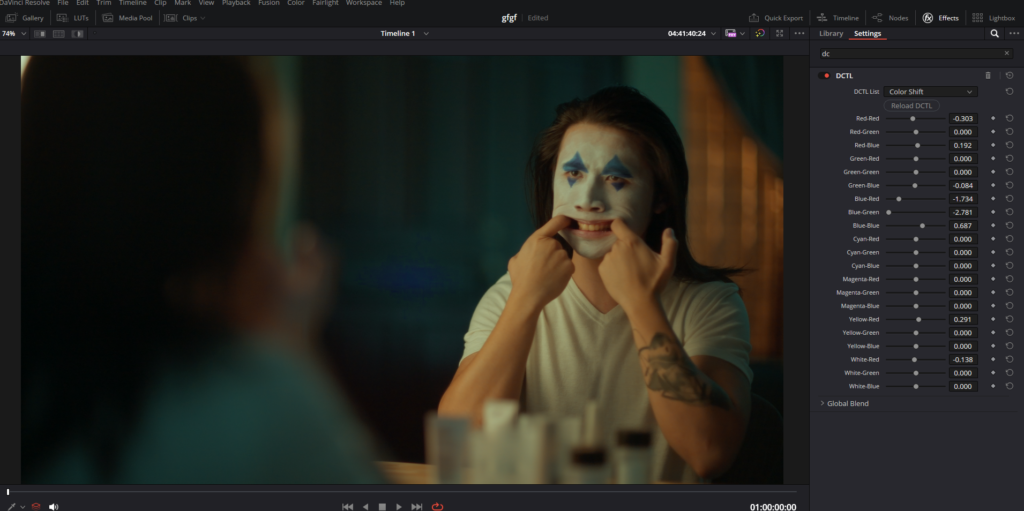
- From the DCTL drop-down menu, select ‘Color Shift Tetra’, Now, you can begin using the controls within the DCTL.
- Adjusting the Parameters:
- With the DCTL applied, stay on the same node so that you can use it further.
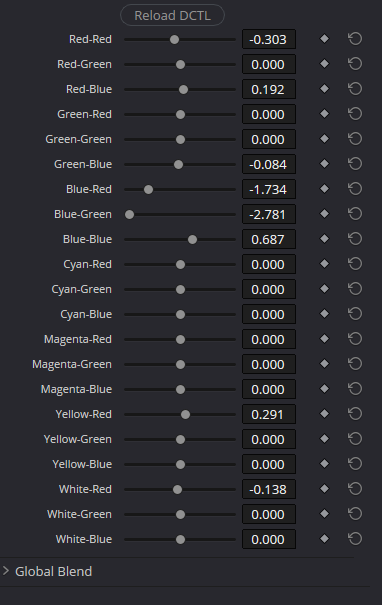
- You’ll see a list of sliders representing different color relationships (e.g., Red-Red, Red-Green, Green-Blue, etc.).
- Start by making small changes—like a subtle push towards warmer reds or cyan blues.
I hope this exploration helps you get started. Let’s keep pushing the boundaries of what digital color grading can do. If you have questions or want to share your experiences, feel free to reach out. After all, color culture thrives when we learn and grow together.
Download the Color Shift Tetra DCTL
Also check out our Film Density DCTL Davinci Resolve article. Happy grading!
Browse Our Cinematography Analysis Glossary
Explore directors, cinematographers, cameras, lenses, lighting styles, genres, and the visual techniques that shape iconic films.
Explore Glossary →